
Geo tagging your photos made easy
Geotagging is the process of embedding Geo-coordinates or Geo-Location or Geographic information in an image, this is usually done by writing the Co-ordinates on to the Image Exif data.
Geographic information includes Latitude, Longitude, Height and other related information.
Why should I Geo-tag?
When photos are Geo tagged, it makes it simple for the viewers to pinpoint the exact location the photo was shot, helps to identify the exact location later when sorting photos or future identification.
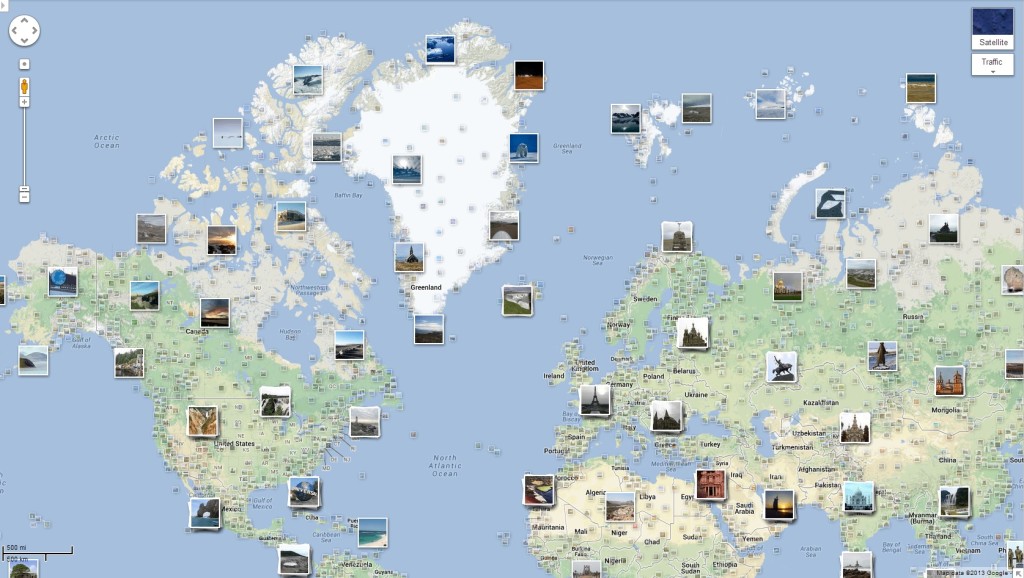
Geotagging is also now read by most of the popular sites like flickr, provides an amazing integration with Google maps to show a Location Map of the fotos you have taken.
How wonderful it would be to see your pics on google map with the exact location details.
What do I need for Geo Tagging?
Its very simple and cheap,
A GPS logger (Costs less than 50 GBP) that can log its position every few seconds and can produce a log file which can be used later to sync with the photos
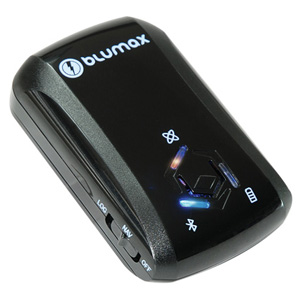
Blumax 4044 GPS logger
A Software to sync the log files with the Photos.
Geosetter sync software
Can I Geo tag without a GPS receiver?
No you don’t need a GPS receiver to do it, although a GPS receiver logger will get the exact co-ordinates of the location and saves the hassle of manually searching the co-ordinates.
My current workflow for Geo Tagging photos
Once you return from your trip to the comfort of your home, connect the GPS logger to the computer and using the provided software or a free software such as the BT747, download the tracks to your computer preferably in .gpx format as this format is widely recognized and also used by Google.
I use a free and fantastic software called GeoSetter (http://www.geosetter.de/en/) to tag my images, my workflow below.
- Download GPS log files as .gpx files
- Download .RAW files or JPG files from camera to your local disk.
- Open GeoSetter, browse to the photos folder for the images to be tagged.
- In Geosetter select the option to Geotag images with tracks.
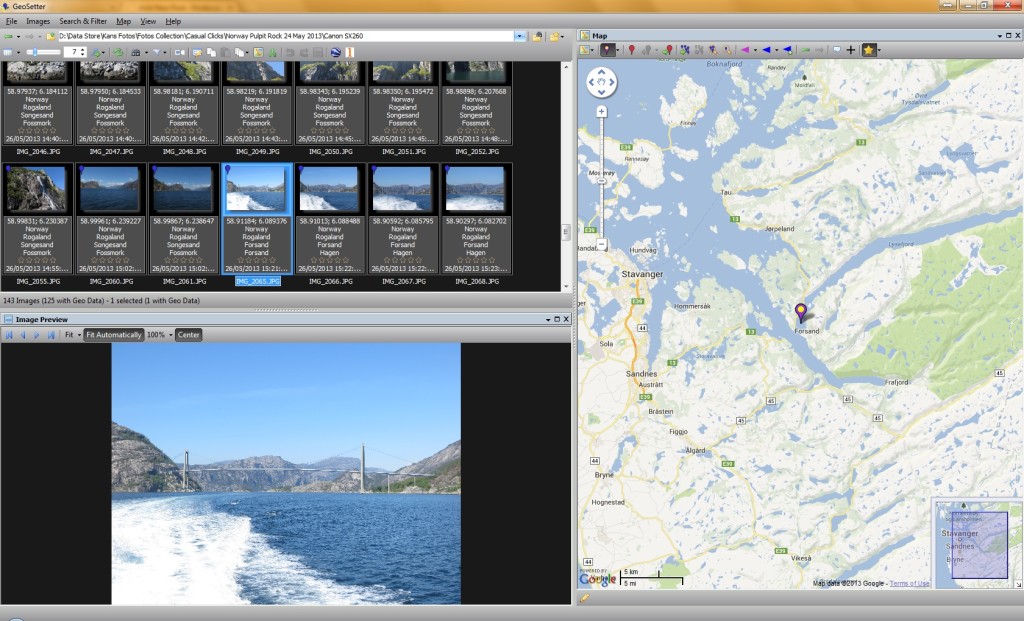
- Open a dialog as shown below.

Geosetter camera time sync
- Red highlights show the settings of interest.
- Camera Time sync is an important step, I normally set the camera time to UTC and then later change it in Geosetter to the correct time using time shift option.
- Get you Camera out of the bag and check the time displayed, now modify the “Additional Time Adjust” values until the “Camera Time” shown matches with the time show on the camera.
- I set the “Maximum time difference….” option to 10 Seconds, and i have the logger set to log every 5 seconds.
- Click on Ok and a dialog shows you the images that matches with the log file locations, and once you Ok it, the corresponding location is written to the Exif on the image.
- Save the changes to the images.
- There is option to time shift, use this to update the Image time to match the actual time it was taken.
Thats it, and you have Geo Tagged all your RAW files with location info, you can now process the RAW files and when exported to JPG will still have the Geo info.
Is Geo tagging same as Geo Stamping?
Tagging means writing GPS coordinates into Exif metadata -same as writing/changing (for example) various DateTime values. Important is: tagging doesn’t change image! With other words: when you open Geo-tagged image, you don’t see GPS coordinates (you need some Exif utility to see and edit those values).
Stamping means you (using some utility) “write” coordinate values directly onto image. So, everybody will see those values by opening/viewing image (you remember old photos containing date/time when they were taken?). The problem is, it is difficult to edit stamped images later. In short: GPS stamped images are not very artistic -they look ugly, actually
![]()
![]()


